miércoles, 27 de marzo de 2013

Building An Ultralight Helicopter

People have always dreamed to fly. After the ultralight aircraft appeared many of the aviation enthusiasts have the possibility to experience regularly the enjoyment of flying on an ultralight helicopter. If you have felt the fun to fly on a helicopter and you would like to do it frequently, the ultralight version is the reasonable choice, which will not empty your wallet. 


What Is Ultralight Helicopter?


It is actually a skeleton of a traditional helicopter without the protection of the normal shell. It has two propellers: one on the top, which has a diameter from 3.5m to 7.5m, depending on the model, and one on the tail, with a diameter between 0.6m and 1.2m. The average weight of an empty ultralight heli is between 65 and 85 kg. The weight of the pilot can be up to 125 kg. However, you will hardly find two ultralight helicopters that are similar as a construction and main characteristics.


How To Get An ultralight Helicopter?


There are two main possibilities: to purchase a ready-made one or to build your own. Maybe you will be interested in the second option. There are quite a good number of models, which you can buy in a kit form. This means that you have to fit the pieces of your aircraft together before the first fly. However, it is necessary to know that besides the enthusiasm this is not a simple project. 

Where To Start?


First answer the questions: What have you built till now? How big is your experience in reading construction plans and assembling pieces? What about the engines: do you have any idea about them?

If your experience is close to zero, the ultralight helicopter should probably be your second building project and you would start with something easier. But if you can rely on the help of someone experienced and your enthusiasm is so big� go ahead. 

What To Buy?


There are many producers of ultralight helicopters, which offer different possibilities. The cheapest way to own a heli is to purchase only construction plans and to bring together all necessary parts of your aircraft by your own. This is the longest way and requires very good background in construction of machines and aircrafts. The average price of construction plans in reduced formats is $90 to $200. The plans of the ultralight helicopter G-1 cost only $32.95. An instruction manual costs in addition $35. The same is the price of a video instruction. Usually the plans in large format have double price.

If you prefer not to to spend so much time you may look for already prepared ultralight helicopter kits, which are offered by all production companies. The prices vary from $2495 for the kit of the famous Mosquito, to $15995 for a complete kit of Kestrel Jet Helicopter. You can find in between several prices for the different parts of the helies: airframe with tail section, main control hub, rotor head, engines, etc. 

Let me give an example with the well-known Adams-Wilson ultralight helicopter called Choppy. It is a single-seat heli, the most famous among the homebuilt aircrafts. If you buy the complete kit you have to spend $22,995. However, if you decide to purchase separate parts you should know that the airframe of the Choppy is $3495, the same is the price of the rotor head and the price of the main control hub is $2495. The experimental version of the Choppy (with gearbox instead of a cog-belt drive system and different engine) costs almost $30000. All Choppy kits include a cockpit as well.

What else you need to build your helicopter?


Most of the kits are prepared so as to be built with ordinary tools and minimum additional costs at home. You don�t need special workshop, but the most frequently working tools are required. 

The rest is time and enthusiasm. Keep your enthusiasm as long as possible, as you will need plenty of it until you reach the first fly with your own ultralight helicopter.

martes, 26 de marzo de 2013

Building an Ultralight Aircraft: Get Yourself Prepared!


Are you ready or not so sure? Begin with understanding of what you want to do and how you want to go about it. Most people build the ultralight aircraft they have been already flying. It is something they are familiar with and have a fair understanding of the different parts of the airplane. 

Purchasing construction plans


The first step in the preparation for aircraft building, therefore, will begin with purchasing or acquiring aircraft construction plans. The plans must contain complete details of all the different parts, materials, tools, drawings and instructions on how to build the aircraft. If the drawings are full size, you will be able to save time and avoid problems that arise from inaccurate scaling up operations. A complete list of materials and sources for the same will help you cut out the time and expense of scouting around for the different parts you need for your plane.

If the company that sells the construction plans will also sell you an aircraft kit, you have got a winner for yourself (unless you really want to build from the scratch). If the instructions are detailed as they should be, you will have no difficulty in assembling the different parts. So you need to focus on the different construction plans available in the market and pick the one that suits you best. You will have to set about acquiring the different parts you need for assembling your plane. 

Read more about building an ultralight airplane with construction plans.

Using Partial Kits? Why not!


If you feel that you need some expertise before investing large sums of money in building your aircraft you could take advantage of using the partial trial kits offered by some companies. The partial trial kit will focus on parts of the plane. For instance, you could buy a tail kit and assemble it. If you decide not to build the plane you can put up the tail for sale, or else you can go ahead and order the rest of the kit. The trail kits also come with an offer of on-phone help. You can call up the company for help and guidance as you go along. 

Once you are done with acquiring the basic components, you will need to focus on getting yourself the necessary tools. Some building kits come with the tools, but not all of them. You need very simple tools you use for everyday things. If you have purchased a kit it will contain a table top drill press, metal cutting band saw(or hacksaw), various hand files, a dremel belt sander, hand drill, prop rivet gun and a table to build things on. You will also need a one inch tubing bender 8 radius, Jigsaw Pinking Shears, a paint brush, screwdriver, sandpaper, bench vice and so on. You will need no welding tools.

Take Care For Your Health


It is also important to remember that working with chemicals of any kind poses certain health hazards. The chemicals and resins can cause allergies. For instance, the materials used in the filler and ground glass can be health hazards. So providing yourself with dust masks and paint filtering masks with good ventilation may be a good idea. Though skin irritation and allergic reactions are rare it is commonsense to take care that you do not expose yourself unnecessarily to harmful irritants. 

If you are ready with all the above, you will have to set aside around 2500-5000 hours for the building process if you are a newbie and use only construction plans without a kit. Professionals can do it for less. Beginners can do it for 500 - 1000 hours if using an ultralight aircraft kit. The fundamental idea is to take on the job slowly and systematically and not rush it. 

Building an Ultralight Aircraft: Using Construction Plans


The ultralight aircraft construction plans are designed to provide the newbie and the professional builder with everything he needs to build a small plane on his own. Each package would contain complete step by step instructions on the art of ultralight aircraft building and all the parts required to execute the project from the scratch--Photos, CAD drawings, full size fittings drawings, a materials list, informative articles, the instruction manual. And of course the details of the parts of the plane you are going to assemble and the source from which you can purchase them. Some plan kits offer construction videos and have websites where the enthusiast can register and access their storehouse of information.

The Affordaplane Construction Plans


The Affordaplane is one of the most popular ultralights available in form of construction plans. Each plan sold by this company has a registered serial number. It contains around 49 CAD drawings of the aircraft and each part is laid out in a large legal size paper in three views. There are drawings which show the user how the parts of the plane fit together and what materials have been used to an advantage. Full size drawings which come with this package are very convenient as there is no scaling up operations to be performed before implementation. 

The 60 page builders manual provides easy to read step by step instructions with a lot of �how to� information that are great time and cost savers. The lists of materials that come with this plan also give details of suppliers in different locations. A bonus article from well known aviation experts is included. Affordaplane also provides its members access to its exclusive online builders section. This section is content rich and members can access information on a variety of aircraft related topics, tips and free updates on products of the company. 

The Fighter Ultralight E-plans


The Fighter Ultralight e-plans provide aircraft building enthusiasts for a small sum of $24.95 with detailed instructions on how to build a simple fighter ultralight. Aluminium alloy tubes, steel tubing, sheets, bolts and rivets, fabric for the detachable wings are listed in its bill of materials with sources for purchase. The plans show the parts dimensions and the drawings provide exploded views and assembly instructions that can be grasped at a glance. The website managed by this company also provides a number of sample plans that users can view before deciding to go in for the products.

Aeros Ultralight Helicopter


The helicopter enthusiast who is looking to build a home built experimental helicopter would find plans for building one at Aeros helicopter. The Aeros construction manual that comes with the plans gives detailed construction prints, photos and assembly instructions to guide the builder. A bonus guidebook titled �Homebuilt Helicopter Guidebook� that is provided as part of the kit has several illustrated examples of how helicopters work and factors that go into the design of the various systems. 

A comprehensive list that is included provides information on sources of engines, metals, AN hardware, cables, controls, rotorblades, instruments and all the regulations that need to be followed. The manual can be ordered separately without the plans too. 

Evans Lightplanes Design


Evans lightplanes design is another company that provides ultralight aircraft building plans. The plan kit comes with a ready source of data used in the field of light plane design. The plans are well laid out on paper with easy to grasp diagrams and illustrations. About 145 pages of simplified tables and charts inform the user on Aero, engines, props, properties of wood, Aluminum, steel, composites, flight and landing loads. 

The G-1 plans


G-1 plan from Gyrobee is designed for those who want to build an affordable, easy-to- build ultralight helicopter / gyroplane. The construction manual provides the constructor with all the details he needs for building Gyrobee. The package includes a valuable guide for the gyrobee hobbyist. The guide contains information on gyroplane basics, rotorblade and hub designs and specifications of various helicopters and gyroplanes. The guide also gives details of construction materials commonly used, a glossary of terms and a list of suppliers of parts and materials. Tables of weights, formula and conversions are a bonus.

Panzamy Aircraft Corporation


Panzamy Aircraft Corporation offers introduction packages for their PL-2, Pl-4A and PL-9 Stork designs in PDF format. 

Plans for Boredom fighter ultralight aircraft can be at http://adap.com/Plans.htm

The list above is only a small sample of the gamut of ultralight aircraft building plans that are available in the market and by no means complete. But these should be enough give you a very good start. 

Build Your Own Ultralight Airplane

One of the most exciting thing in the ultralight aviation is the fact you can build your airplane yourself. I know it sounds scary if you are a beginner. It scaried me as well.


But building your ultralight aircraft yourself does not require engineer knowledge (although it helps!), neither a big professional workshop.


There are many enthusiasts like you and me who build their aircrafts themselves with the help of construction plans or aircraft kits.


Read on, I'll show you how you can go ahead on this amazing, exciting and glorious route. 

How To Fly Easier With Flex Wing Ultralight Aircrafts (Ultralight Trikes)

When I first learned about the microlight airplanes, I was very excited. The idea to buy my own aircraft for less than $10,000 was really very tempting. But then I started thinking about the related expenses - hangar, airport taxes, support of the plane, license costs... And the things were not so great anymore.

Sometimes (and especially when we talk about ultralight aviation) the cost and troubles of buying the aircraft itself is nothing compared to the related expenses. That's it, the airplane is not a car, you can just drive it on the streets or keep it in your garage. Or at least this is valid about the fixed wing ultralights.


The Flex Wings...


The flex wing microlights and ultralights came on the scene in 1970s as a solution to many of these troubles. If you choose to own a flex wing microlight instead of ordinary ultralight airplane, you won't have to think about many or all of the following troubles:

  • Hangar

  • Airport taxes

  • Runway

  • Licensing

And most often you'll get even the aircraft itself for cheaper.

Flex Wings Aircraft
Photo from http://www.start-flying.com


So what is a Flex Wing Aircraft? (Also known as Ultralight Trike)


Most flex wings consist of a delta bar, similar to the hang gliders, an engine and a place for one or two pilots. Usually there is no cabin and during the fly the pilots are able to feel the air.

Easy to guess by the name, the wing of the trikes is flexible to some extent and often can be taken off. Because of it's form, the entire aircraft dimensions are smaller than these of a fixed wing. This means if you have a large garage, you can hangar the trike there.

The ultralight trikes can get off the ground from the automobile road and can land almost everywhere - so you save another huge expense and trouble, because you don't need an airport and runway.

The engines of the ultralight trikes are generally four or two strokes with 25 to 75 Horsepower. The speed is traditionally lower than with the fixed wings - 30-60mph cruise speed is something normal.

Control of Ultralight Trikes


If you have not yet flown on a fixed wing aircraft, controlling your flex wing airplane will be easy. The trikes have two axes roll and pitch, that are controlled by a bar connected directly to the wing. The trike warps the wing to the one or the other side when the pilot shifts his own weights. Controlling the flex wing ultralight is intuitive.

Safety and Licensing


At the beginning the flex wing airplanes did not require license at all. As a result of that everyone was building trikes themselves and was flying with or without experience. The ultralight trikes were known as very unsafe flying vehicles.

Today, in USA, UK and Canada and for most other countries a sport pilot license is required to fly your ultralight trike. This has turned the things on the other side and we can stay assured that the modern flex wing aircrafts are one of the safest planes for leisure aviation.

... And the Costs


As mentioned above, the flex wing microlights and ultralights are generally cheaper than their fixed wing "brothers". The brand new ones still cost $10,000 - $30,000, but you can own a safe and ready to fly second hand one for as low as $5,000.

The associated costs of owning such one are often compared to the costs of owning a second car - it's definitely affordable.

The extreme simplicity - powered paragliders


Do you think you have seen everything that people do to fly easy and for cheap? Maybe. But not if you think that the ultralight trikes are the simplest way to fly with engine.

Flex Wings Aircraft
Photo from http://www.paramotor.us/


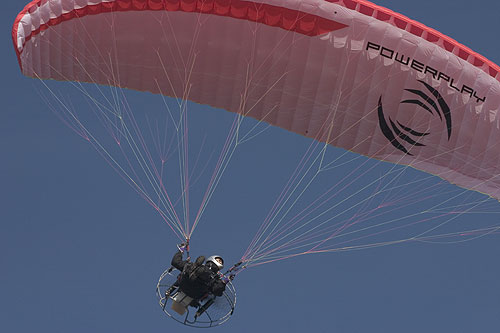
Some pilots have gone further in simplifying the flying process and making it cheaper. Why not fly with paraglider? The ordinary paragliders have some disadvantages, because you need to go at some high place (mountain) and jump from there. And of course flying without engine has some limits.

That's why there are people who invented the motorized paragliders - a very simple aircrafts, which can be built for less than $2,000! These microlight aircrafts contain a propeller, a seat a simple control. They require no license at all. Of course you can't feel like an airplane pilot in such a vehicle, but if you are on budget, that is for you - it's nearly free!

Whatever of the options you choose, the flex wing ultralight airplanes will provide you with exciting low cost way to fly. They are one of the best options for amateurs who are not interested into mastering pilot skills and managing complex machines. The others of course will still prefer the fixed wing airplanes. 

How to fly an ultralight aircraft?


This section is to introduce you to the forces acting on the airplane in flight.
 
For a moment, think of an airplane moving from left to right and the flow of air moving from right to left.  The weight or force due to gravity pulls down on the plane opposing the lift created by air flowing over the wing. Thrust is generated by the propeller and opposes drag caused by air resistance to the airplane.  During take off, thrust must be greater than drag and lift must be greater than weight so that the airplane can become airborne.
For landing thrust must be less than drag, and lift must be less than weight.
the four forces acting on an aeroplane

An airplane in flight is the centre of a continuous tug of war between four forcesliftgravity force or weightthrust, and drag.Lift and Drag are considered aerodynamic forces because they exist due to the movement of the aircraft through the air.  The weight pulls down on the plane opposing the lift created by air flowing over the wing. Thrust is generated by the propeller and opposes drag caused by air resistance to the frontal area of the airplane. During take off, thrust must overcome drag and lift must overcome the weight before the airplane can become airborne. In level flight at constant speed, thrust exactly equals drag and lift exactly equals the weight or gravity force. For landings thrust must be reduced below the level of drag and lift below the level of the gravity force or weight.

Thrust

Thrust is a force created by a power source which gives an airplane forward motion. It can either "pull" or "push" an airplane forward. Thrust is that force which overcomes drag. Conventional airplanes utilize engines as well as propellers to obtain thrust.

Drag

Drag is the force which delays or slows the forward movement of an airplane through the air when the airflow direction is opposite to the direction of motion of the airplane. It is the friction of the air as it meets and passes over and about an airplane and its components. The more surface area exposed to rushing air, the greater the drag. An airplane's streamlined shape helps it pass through the air more easily.
Lift is produced by a lower pressure created on the upper surface of an airplane's wing compared to the pressure on the wing's lower surface, causing the wing to be "lifted" upward. The special shape of the airplane wing (airfoil) is designed so that air flowing over it will have to travel a greater distance faster, resulting in a lower pressure area (see illustration) thus lifting the wing upward. Lift is that force which opposes the force of gravity (or weight).
Many believe that this explanation is incorrect because flat wings (such as seen on balsa wood airplanes, paper planes and others) also have managed to create lift.
Lift is a partial vacuum created above the surface of an airplane's wing causing the wing to be "lifted" upward. The special shape of the airplane wing (air foil) is designed so that air flowing over it will have to travel a greater distance - faster - resulting in a low pressure area ( see illustration) thus lifting the wing upward. Lift is that force which opposes gravity.

wing shape (aerofoil)

angle of attack

The angle of attack is the angle that the wing presents to oncoming air, and it controls the thickness of the slice of air the wing is cutting off. Because it controls the slice, the angle of attack also controls the amount of lift that the wing generates (although it is not the only factor).

Zero angle of attack
Shallow angle of attack


steep angle of attack
          

First Flying Experience


Flying, I've come to find, is challenging, but not impossible. Mark (the co-worker who got me hooked in the first place) referred me to a flight instructor at the Squadron Two Flying Club in San Jose. He then gave me a price listing of what it would take to get a pilot's certification flying a Cessna 152--the cheapest rental plane in the fleet. It wasn't bad, so after a two-hour phone call, we set up lessons. There would be an hour of ground instruction, and then I was to get into the plane and fly it. As simple as that.

I sneaked out of work at four and met my instructor at the flying club, in what used to be the old San Jose Airport. While The instructor explained the syllabus (wow, things go by fast------I do my first solo flight when?), a steady line of jets rumbled by the front window on their way to the runway. We covered pre-flight, including pre-flighting the pilot, then grabbed the keys and trotted out to the lot to meet "my" airplane, 714VT.

Despite its nickname, "Vicious Terrible," the small yellow-and-white plane looked un-intimidating enough. After a long, step-by-step pre-flight, we towed the plane out of its parking space, strapped in and started it up.
Here lay the first challenge: taxiing. Unlike a car, where you steer with your hands and control speed with your feet, in a plane you steer with your feet on the nose wheel/rudder pedals and control speed with your hand on the throttle. There are also brakes at the tips of the rudder pedals. This took some getting used to, and under my "control," the plane wobbled drunkenly all over the place. Also, with my hand on the throttle, I got the impression I was running a lawn mower with wings.

We finally got into position by the runway and did our final check on the engine, electrical systems and controls, and then it was our turn to take off. I managed to get Vicious Terrible off the ground by myself, and as we were climbing straight out, the radio went dead. Unconcerned, the instructor left me to fly the plane while he whacked at the radio--brave guy. He got it working somewhat, and we turned to the mountains over Palo Alto and began manoeuvres.

The first lesson consisted of very simple stuff: straight and level flight, making shallow turns, climbs and descents, and trimming the nose (there's a little wheel or crank you adjust to set up back pressure and make flying easier). The only thing that made flying difficult at this point was the setting sun, which was right in my eyes, and I'd forgotten my sunglasses. Oh, and I had to keep my hand on the throttle at all times, which was rough on my shoulder. This is, I was told, to establish a habit that will eventually protect me from a sadistic inspector during my check ride--with my hand there, the inspector can't "inadvertently" push in or yank out the throttle without my knowledge. That's encouraging.

Again, the radio futzed out and The instructor started whacking at it again, and decided to call it a day, but at least the radio worked enough for us to get landing clearance.

Landing... the syllabus didn't say anything about my landing the plane, and here I learned my first true lesson of the day: expect the unexpected. We turned over downtown San Jose and approached the airport, dropping altitude, and the instructor still doesn't have his hands and feet anywhere near the controls. The runway looms closer, and he still hasn't said, "My airplane," meaning I give over control. The ground is getting closer, and suddenly some bumpy air starts knocking the plane arou-aaaAAAAAAA! "Don't get ground-shy," The instructor says. Ground-shy? I don't wanna hit the ground! One more hard bounce, and The instructor takes over.

The lesson ends and I drag myself home at nine o' clock, giggling insanely. I flew the plane--that's so cool! The instructor hadn't touched the controls for nine tenths of the trip.

I Have Some Questions ...


How long does learning to fly take?

Learning to fly is not difficult, but it does require study and practice. Your aviation authority itemizes the things you must learn and the minimum hours of training and solo flight to earn a private pilot certificate. The minimum hours will vary from country to country but averages at about 45 hours. Few people complete their training in the minimum amount of time; most take 60 to 80 hours.

How long does a lesson last?

While most lessons are based on a one-hour flight, they may take two hours from start to finish because there's more to it than flying. There are pre- and post-flight discussions, in which you and your certificated flight instructor (CFI) talk about what you're going to do during your flight, how you performed, what you did well, what needs work, and what you'll do on your next lesson.

How safe is it?

General aviation (GA) is as safe as any other mode of travel, if not safer. You don't need a parachute because airplanes (and helicopters) do not fall from the sky, even if the engine stops. An aircraft without an engine, even if it's supposed to have one, is a glider and can be guided safely to the ground. If an engine quits, for example, the most common cause is the pilot ran out of gas. In other words, flying is as safe as the pilot makes it.

What kinds of licenses are there?

Pilots earn certificates, not licenses. Students work toward either a sport, recreational, or private pilot certificate. While the training for these is basically the same, the sport and recreational certificates are designed for fun flying close to home. In other words, sport and recreational pilots don't need or get the same training that private pilots must have for flying at night, on cross-country trips, or in more complex airspace.
Once you earn a private certificate, you can move up the ladder, if you so desire, to a commercial certificate, which enables you to fly for hire. A flight instructor certificate enables you to teach others to fly, and an airline transport pilot certificate is needed to captain an airliner. You can add a number of ratings to these certificates that let you fly airplanes in bad weather, seaplanes, gliders, helicopters, balloons, and airplanes with more than one engine.

Can I carry passengers?

Student pilots cannot carry passengers when flying solo. Friends or family may ride along on dual lessons (when the instructor is in the airplane); however, it's a good idea to discuss this with your instructor in advance. Recreational and sport pilots may carry only one passenger at a time; private pilots may carry as many passengers as the airplane will legally seat.

What about a medical exam?

In most cases, a student pilot certificate is also the medical certificate. This dual-purpose piece of paper is good for 24 months or less if your are over 40 years of age, and you get it from an aviation medical examiner, who is an aviation authority-approved doctor. Your instructor or flight school can connect you with one. You will need your student/medical certificate before you can fly an airplane solo (with out an instructor on board the aircraft), but it's often a good idea to get it before you start training.

What's ground school?

Flight training is divided into two parts: ground school and flight training. Ground school teaches you the principles, procedures, and regulations you will put into practice in an airplane — for example how to navigate from one airport to another. You have several ground school options, including a scheduled classroom course that may be offered at a flight school, weekend ground schools, or a home-study course.

When will I actually begin flying?

You'll be flying on your first lesson, with your flight instructor's (CFI's) help, of course. With each successive lesson, your CFI will be helping less and less, until you won't need any help at all. When you reach this point, you will make your first solo flight, an important milestone in every pilot's training, in which you will fly as the sole occupant of the airplane. After you solo, you and your CFI will work on such things as flying cross-country trips to other airports.

What To Expect When You Learn To Fly


Pre-solo

During this initial phase of your flight training, your goal is to develop the skills needed to inspect the aircraft before each flight (preflight the aircraft), taxi to the runway, take off, fly around the airport traffic pattern, and land your aircraft all alone, without your instructor's help. In other words, to solo! To do that, you'll need to understand many new concepts while learning some key terms from aviation's vocabulary. But most important, you'll need to learn how to fly the airplane under favourable weather conditions at your local airport, including when and how to communicate over the radio.

Flying Solo

Learning doesn't stop after you solo. In fact, once you've flown by yourself, there's much more for you to learn as you prepare for the next milestone in your training. In most cases, after your first solo, you'll have a couple of supervised solos — you'll fly part of a session with your instructor and the rest alone, much like your first solo. Then your instructor will allow you to practice by yourself at your home airport, perhaps specifying certain weather conditions or areas in which you're allowed to fly. You'll need to master operations in the airport traffic pattern, understand winds, and learn to recognize when conditions are beyond your capabilities. It's also time to learn more about leaning the engine's fuel/air mixture and other finer points of aircraft operation. A thorough understanding of your aircraft's systems and operations will serve you well as you progress in your training.

Manoeuvres

During this stage of your flight training, you may feel like all you're doing is practicing manoeuvres — over, and over, and over. Why now? Well, you do have to master these skills before you take your check ride, but you'll want to have them under your belt before you begin your cross-country flights (which will be coming up soon). It's also time to think about taking the written tests which vary in format from country to country.

Cross Country

For most student pilots, the cross-country phase of training brings a new rush of excitement. All the elements of your training come together as you expand your aeronautical horizons, first with your flight instructor and, then, by yourself as you close in on the solo cross-country experience requirement of the pilot certificate that you're pursuing. Part of the excitement, no doubt, comes from the realization that you're nearing your objective. There can be apprehension, too, and perhaps even a fear of getting lost — but your knowledge of the established and proven procedures for just that contingency should help to alleviate any concerns.

Flight Tests

You're nearly finished training for your pilot certificate. The next training objective is the flight test, which will vary from country to country in its requirements. Upon passing this milestone, you will have qualified as a private pilot!

lunes, 25 de marzo de 2013

What's ULM?


Ultralight aviation (called microlight aviation in some countries) is the flying of lightweight, 1 or 2 seat fixed-wing aircraft, . Some countries differentiate between weight shift and 3-axis aircraft, calling the former "microlight" and the latter "ultralight".
During the late 1970s and early 1980s, mostly stimulated by the hang gliding movement, many people sought affordable powered flight. As a result, many aviation authorities set up definitions of lightweight, slow-flying aeroplanes that could be subject to minimum regulations. The resulting aeroplanes are commonly called "ultralight aircraft" or "microlights", although the weight and speed limits differ from country to country. In Europe the sporting (FAI) definition limits the maximum take-off weight to 450 kg (992 lb) (472.5 kg (1,042 lb) if a ballistic parachute is installed) and a maximum stalling speed of 65 km/h (40 mph). The definition means that the aircraft has a slow landing speed and short landing roll in the event of an engine failure.
In most affluent countries, microlights or ultralight aircraft now account for a significant percentage of the global civilian-owned aircraft. For instance in Canada in October 2010, the ultralight aircraft fleet made up to 19% of the total civilian aircraft registered. In other countries that do not register ultralight aircraft, like the United States, it is unknown what proportion of the total fleet they make up. In countries where there is no specific extra regulation, ultralights are considered regular aircraft and subject to certification requirements for both aircraft and pilot.